> ## Documentation Index
> Fetch the complete documentation index at: https://docs.air3.com/llms.txt
> Use this file to discover all available pages before exploring further.
# Quickstart: Integrating AIR Kit for login
> Install the AIR Kit Web SDK, get your Partner ID, and log users in with their AIR Account in a few steps.
Add AIR login and session handling to your web app. You can use login without integrating credential issuance or verification.
To see the login experience first, open the [single sign-on demo](https://demo.air3.com/demo/single-sign-on). It is a click-through, not a live session.
## Before you start
* An AIR Developer Dashboard account and Partner ID
* A web app running in the browser, with its origin added in **Account → Domains**
* A supported Node.js version for your framework and AIR Kit
You don't need a database, issuer backend, credential program, or Partner JWT for the standard AIR login shown here.
## Step 1: Install the SDK
```bash theme={null}
npm i @mocanetwork/airkit
```
## Step 2: Get your Partner ID
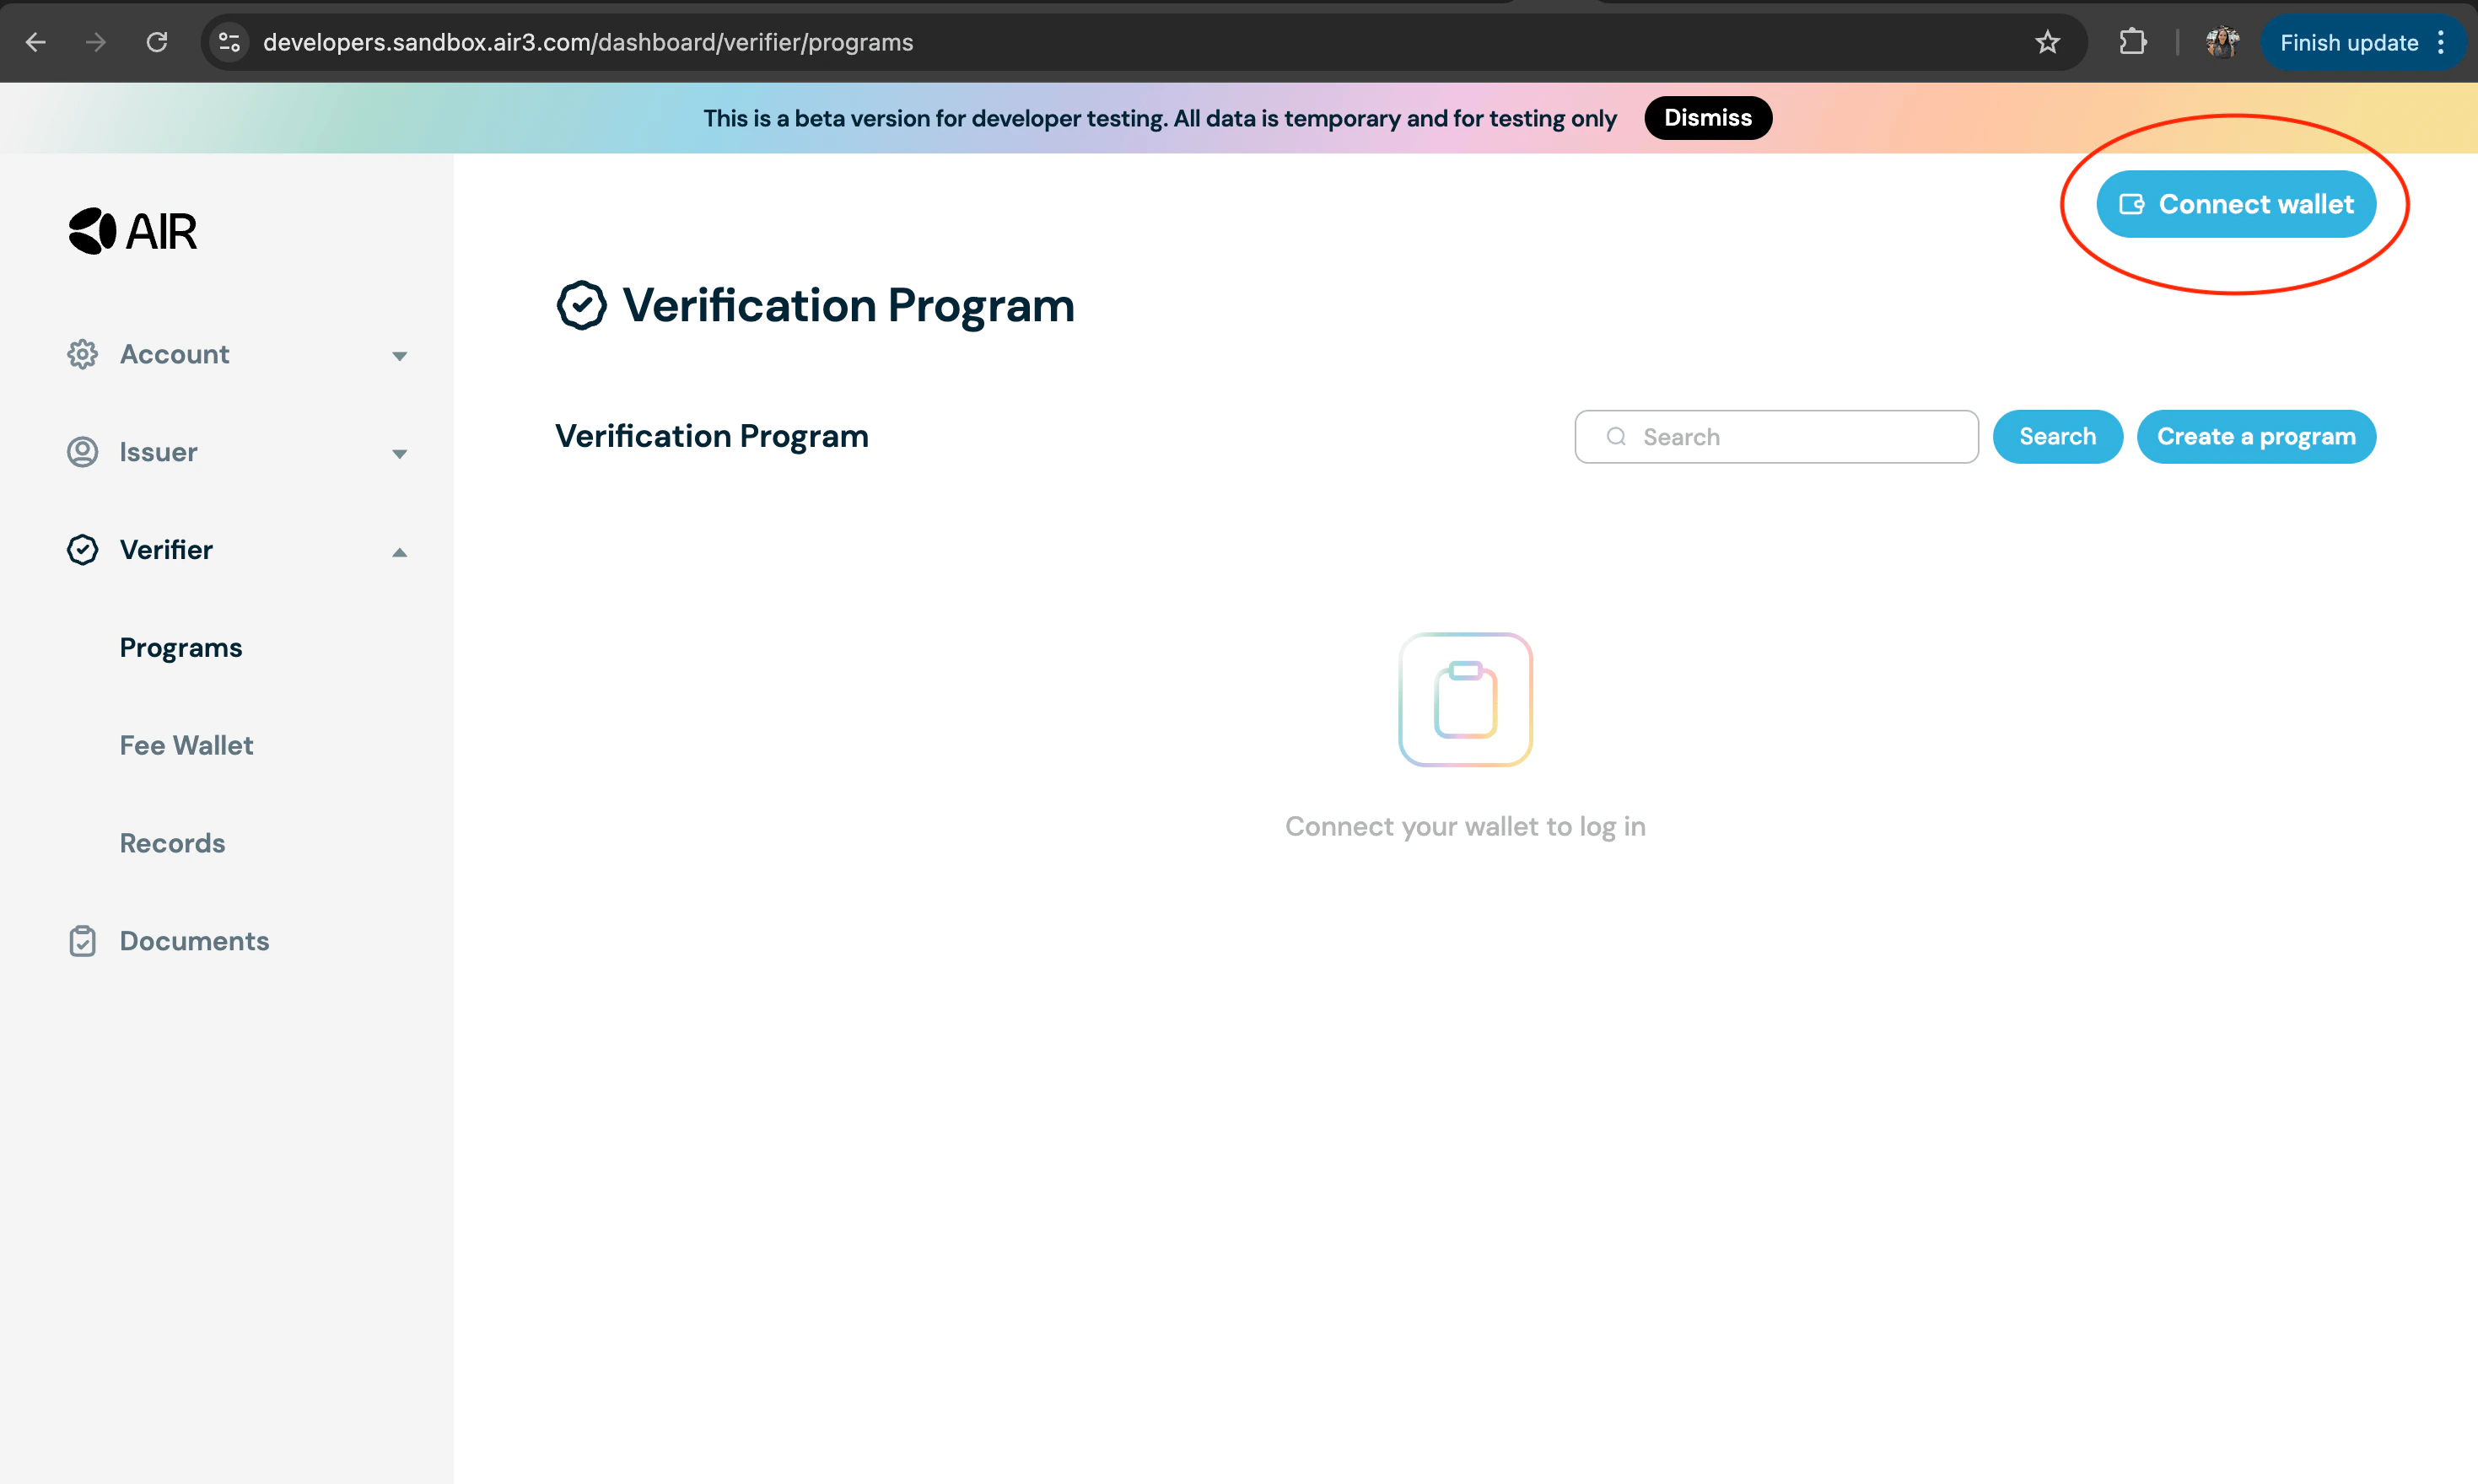
1. Go to the Developer Dashboard and sign in by connecting your EVM wallet.
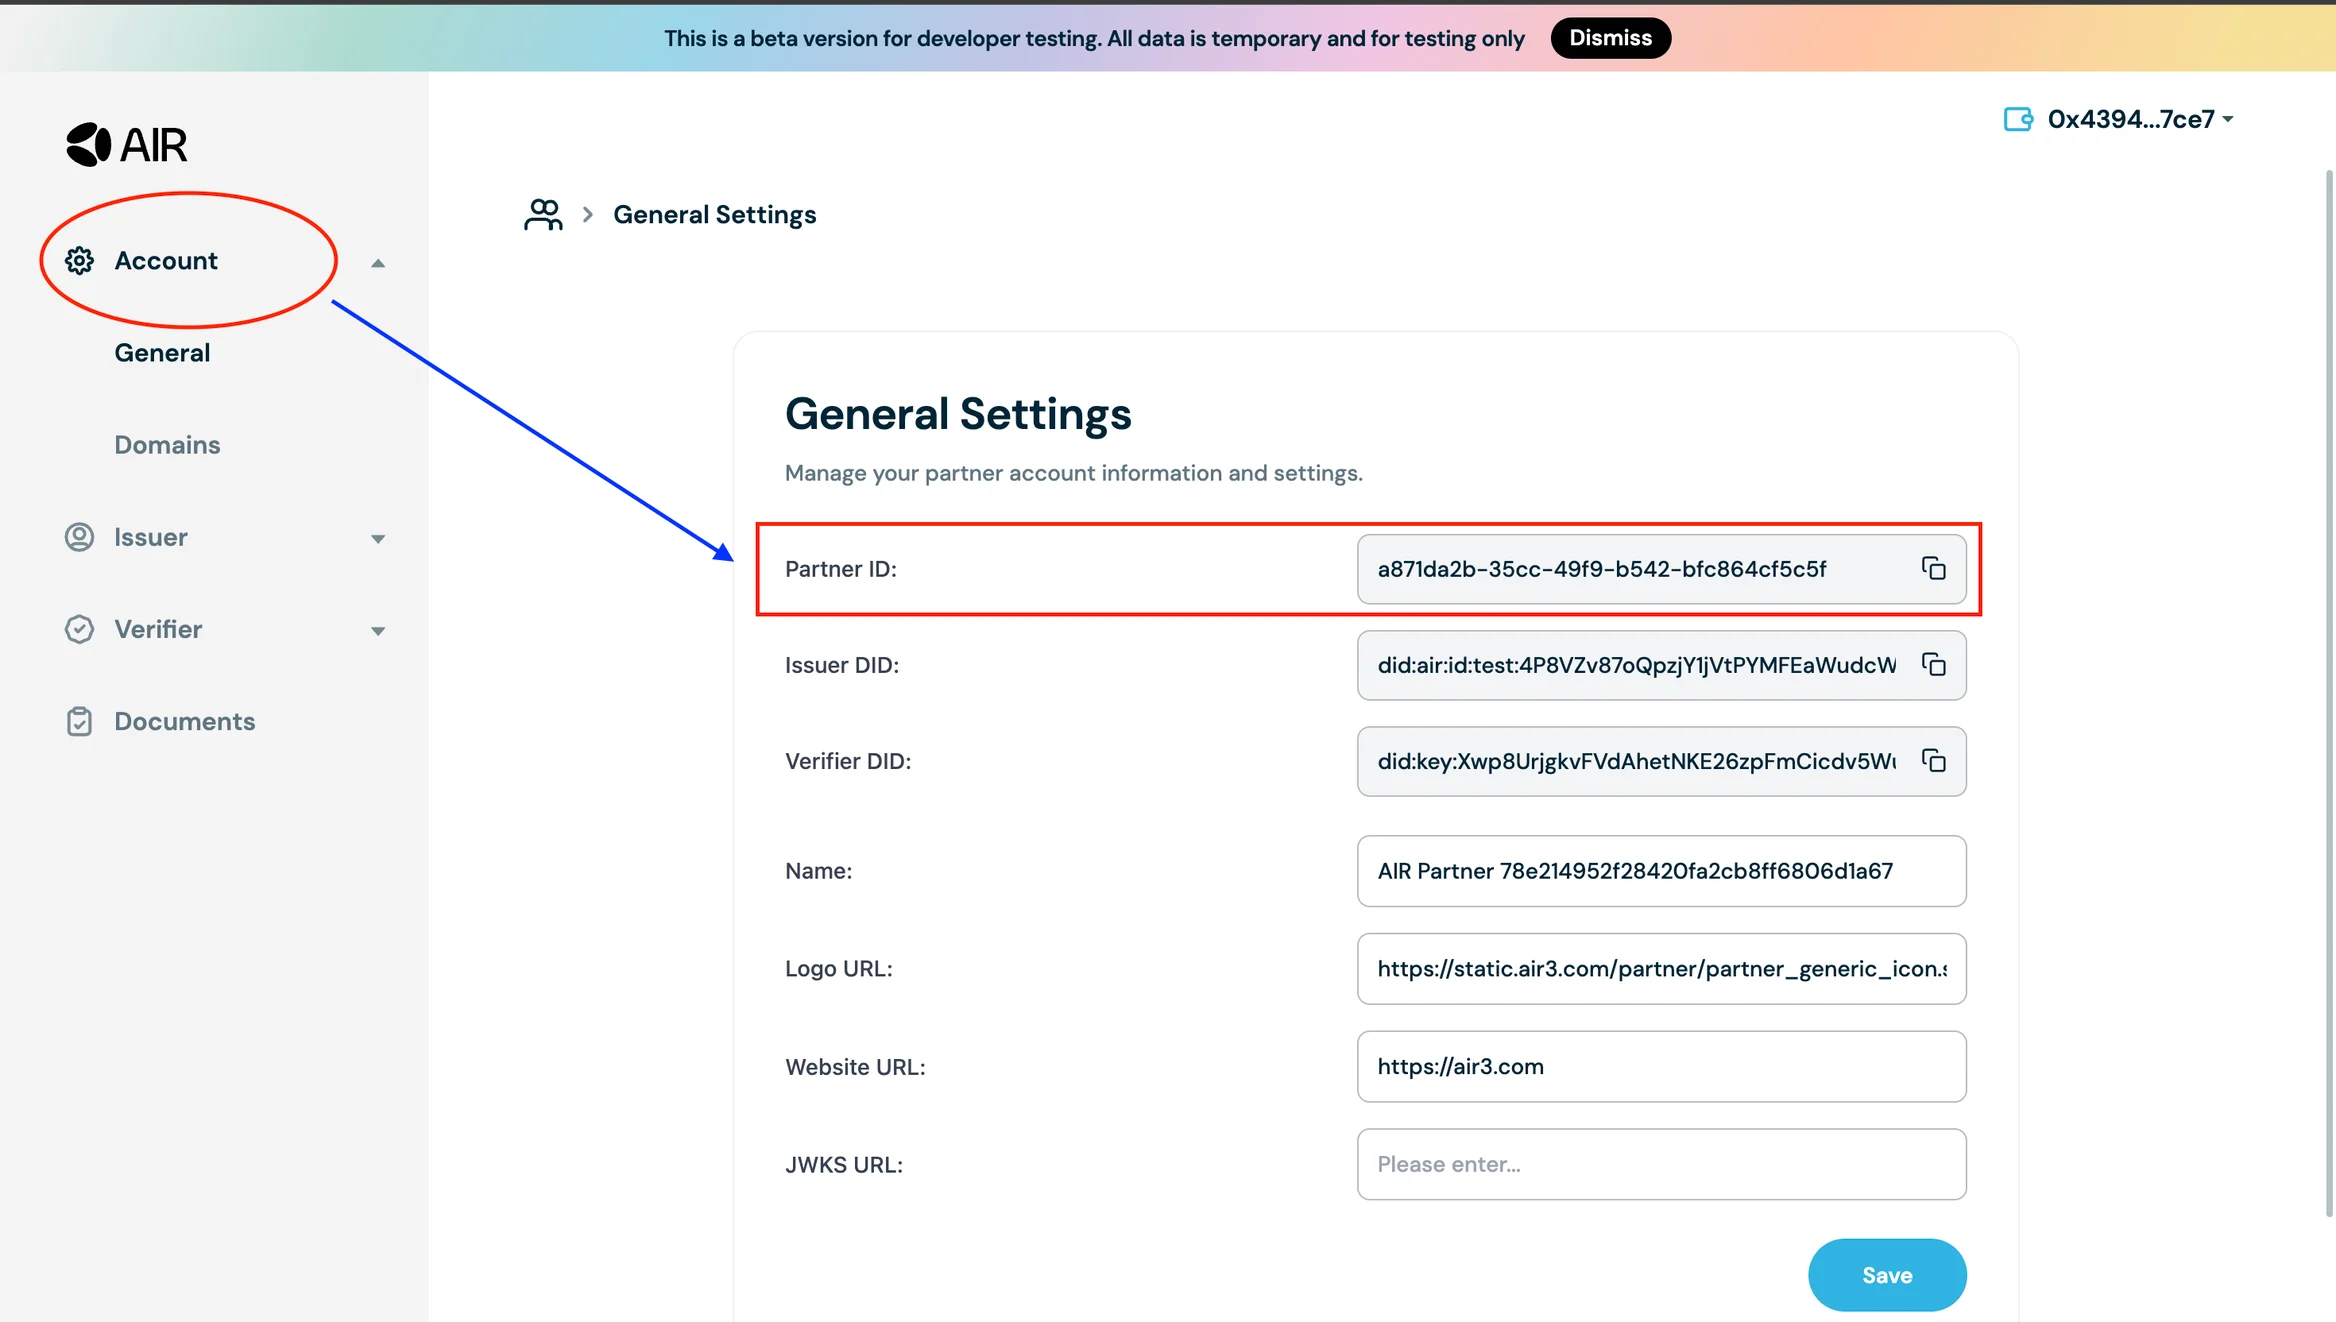
 2. Open **Account → General Settings** and copy your **Partner ID**.
 ## Step 3: Initialize and log in
Create the service once in browser code. Call `loginToAir()` from a user action,
such as a login button; do not run this helper during server rendering.
```ts theme={null}
import { AirService, BUILD_ENV } from "@mocanetwork/airkit";
const service = new AirService({
partnerId: ""
});
export async function loginToAir() {
if (!service.isInitialized) {
await service.init({ buildEnv: BUILD_ENV.SANDBOX });
}
if (!service.isLoggedIn) {
await service.login();
}
return service.isLoggedIn;
}
```
This will:
* Initialize the `AirService` within the [sandbox environment](/get-started/environments/about)
* Present the SSO Login screen of AIR Kit for users to log in
* Handle authentication and session setup
* Establish the user session used by Account Services and subsequent credential flows
Login does not activate your partner's issuer or verifier functionality. Credential
operations also require registered partner authentication, the appropriate
Dashboard setup, and an active issuance or verification program.
## Session lifecycle
Use `service.isLoggedIn` to check the current session. To sign the user out, call:
```ts theme={null}
await service.logout();
```
Handle cancelled login and errors in your UI, and confirm that the user can sign
out and log in again. For session rehydration and user details, see
[Sessions & user info](/get-started/authentication/sessions).
## Next steps
* [Issuing your first credential](/get-started/quickstarts/issue-credentials) and [Verifying your first credential](/get-started/quickstarts/verify-credentials), if your app needs credentials
* [Smart accounts](/products/money/smart-account), to use the user's embedded wallet
* [Customization options](/get-started/customization/theming), to change the theme, login methods, and language
This documentation is built and hosted on [Mintlify](https://mintlify.com), a developer documentation platform.
## Step 3: Initialize and log in
Create the service once in browser code. Call `loginToAir()` from a user action,
such as a login button; do not run this helper during server rendering.
```ts theme={null}
import { AirService, BUILD_ENV } from "@mocanetwork/airkit";
const service = new AirService({
partnerId: ""
});
export async function loginToAir() {
if (!service.isInitialized) {
await service.init({ buildEnv: BUILD_ENV.SANDBOX });
}
if (!service.isLoggedIn) {
await service.login();
}
return service.isLoggedIn;
}
```
This will:
* Initialize the `AirService` within the [sandbox environment](/get-started/environments/about)
* Present the SSO Login screen of AIR Kit for users to log in
* Handle authentication and session setup
* Establish the user session used by Account Services and subsequent credential flows
Login does not activate your partner's issuer or verifier functionality. Credential
operations also require registered partner authentication, the appropriate
Dashboard setup, and an active issuance or verification program.
## Session lifecycle
Use `service.isLoggedIn` to check the current session. To sign the user out, call:
```ts theme={null}
await service.logout();
```
Handle cancelled login and errors in your UI, and confirm that the user can sign
out and log in again. For session rehydration and user details, see
[Sessions & user info](/get-started/authentication/sessions).
## Next steps
* [Issuing your first credential](/get-started/quickstarts/issue-credentials) and [Verifying your first credential](/get-started/quickstarts/verify-credentials), if your app needs credentials
* [Smart accounts](/products/money/smart-account), to use the user's embedded wallet
* [Customization options](/get-started/customization/theming), to change the theme, login methods, and language
This documentation is built and hosted on [Mintlify](https://mintlify.com), a developer documentation platform.