> ## Documentation Index
> Fetch the complete documentation index at: https://docs.air3.com/llms.txt
> Use this file to discover all available pages before exploring further.
# What is AIR Kit?
> AIR Kit is the SDK and set of APIs for adding AIR Account login, embedded smart accounts, and verifiable credentials to web and mobile apps.
AIR Kit is the SDK and set of APIs you use to add AIR to your app. With it, your users sign in with an AIR Account, hold assets in an embedded smart account, and carry verifiable credentials that other apps can check with their consent.
AIR stands for **Account, Identity, Reputation**. Each user has one AIR Account that works across every app that integrates AIR Kit, so a user who signed in to one partner app can sign in to yours with the same account.
## What you can build
| Capability | What it gives your app | Start here |
| - | - | - |
| **Login** | Google and passwordless email login, single sign-on across AIR apps, and session handling. You can also keep your own login and pass users in. | [Login quickstart](/get-started/quickstarts/login) |
| **Credentials** | Issue credentials from your own data, signed with your keys and encrypted to the user. Verify credentials from other issuers, receiving only the claims you request. | [Credentials overview](/products/identity/credentials-flow) |
| **Smart accounts** | A wallet tied to the user's AIR Account, with no seed phrase, sponsored gas, and EVM tooling support. | [AIR Money](/products/money/what-is-air-money) |
| **Agents** | Let an AI agent act for a user, with verifiable proof of who it represents and what it may do. | [AIR Agent](/products/agents/what-is-air-agents) |
Credentials, smart accounts, and agents all build on the user's AIR Account. You can use login on its own and add the rest later.
## How an integration fits together
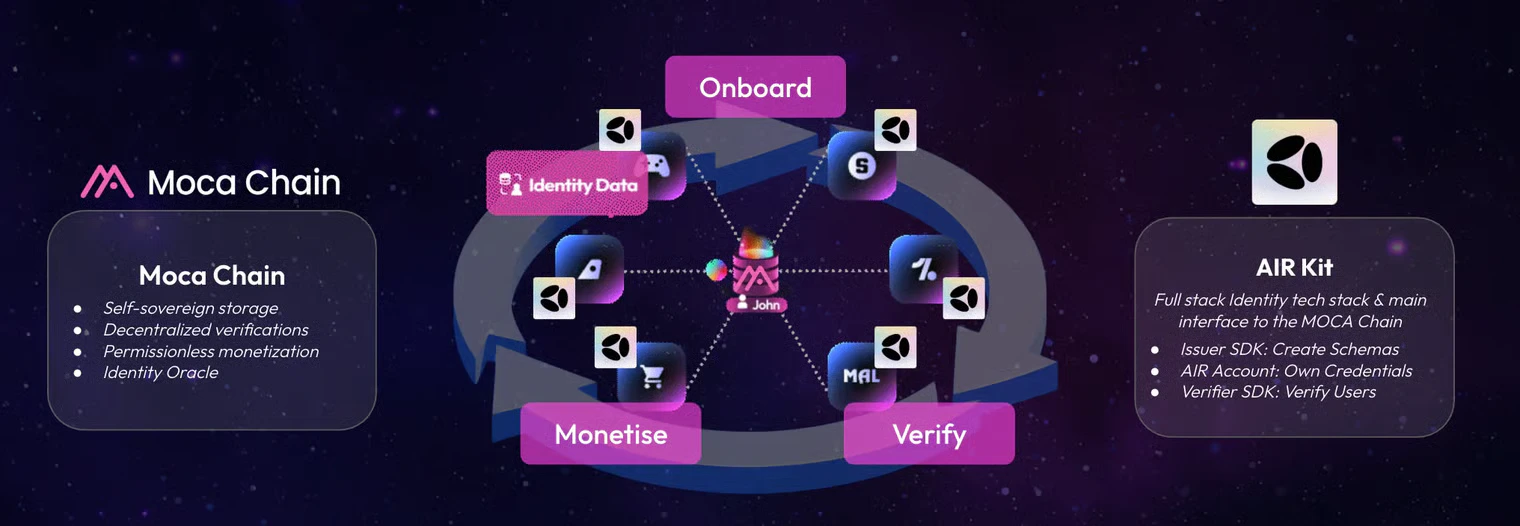
An AIR Kit integration has up to four parts:
1. **Your app** loads the AIR Kit SDK ([Web](/get-started/sdks/web) or [Flutter](/get-started/sdks/flutter/overview)), which shows the AIR login, consent, and wallet screens.
2. **The Developer Dashboard** holds your Partner ID, allowed domains, and the schemas and programs that define what you issue and verify.
3. **Your backend** signs short-lived Partner JWTs that authenticate your app to AIR. If you issue credentials, it also runs an issuer service that signs them.
4. **AIR and Moca Chain** store encrypted credentials and run login, wallet, and verification services. AIR never sees the plaintext of a credential.
 ## Where to start
Install the SDK and log a user in.
Run an issuer service and issue your first credential.
Request a credential and verify it on your backend.
Not sure AIR Kit fits your use case? See [When to use AIR Kit](/get-started/when-to-use-airkit).
This documentation is built and hosted on [Mintlify](https://mintlify.com), a developer documentation platform.
## Where to start
Install the SDK and log a user in.
Run an issuer service and issue your first credential.
Request a credential and verify it on your backend.
Not sure AIR Kit fits your use case? See [When to use AIR Kit](/get-started/when-to-use-airkit).
This documentation is built and hosted on [Mintlify](https://mintlify.com), a developer documentation platform.