> ## Documentation Index
> Fetch the complete documentation index at: https://docs.air3.com/llms.txt
> Use this file to discover all available pages before exploring further.
# Creating your first schema
> Create and publish AIR Kit credential schemas using the Schema Builder — define fields, types, and validation rules without code.
Credential schemas are the foundation of your credential issuance system. This guide will help you understand, create, and manage schemas effectively for your AIR Kit applications.
## Creating schemas with the Schema Builder
The AIR Kit Schema Builder provides an intuitive interface for creating credential schemas without requiring technical knowledge of JSON schema structures.
### Step 1: Access the Schema Builder
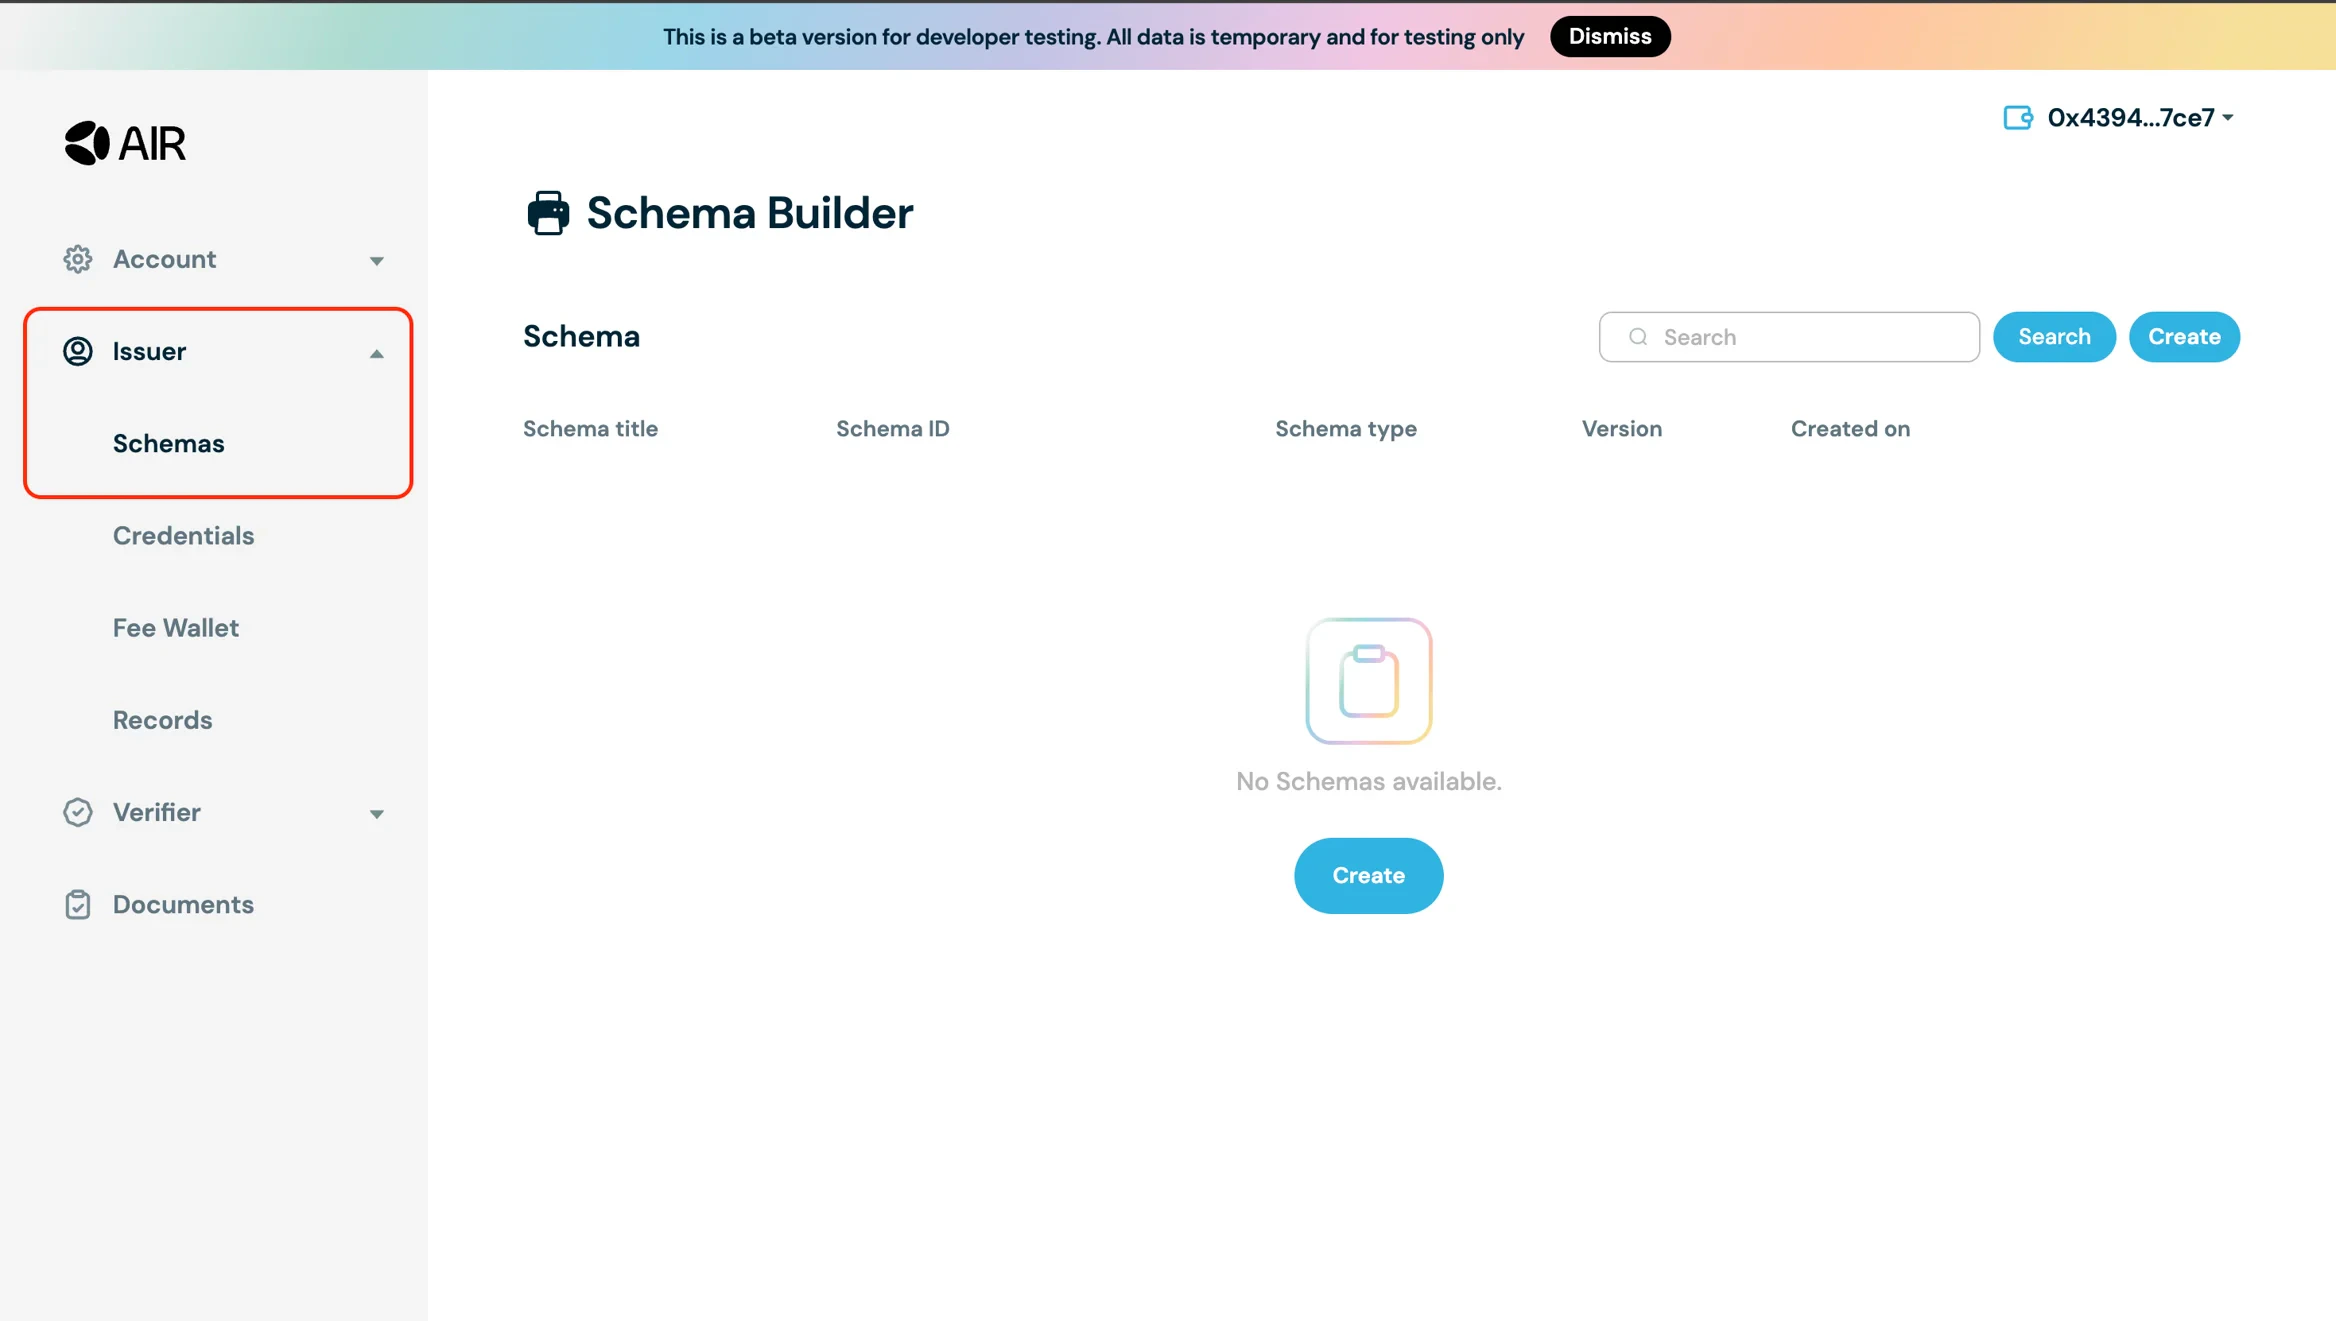
1. Go to the [Developer Dashboard](https://developers.sandbox.air3.com/dashboard/issuer/schemas)
2. Navigate to the **Schemas** section under **Issuer**
 ### Step 2: Create a new schema
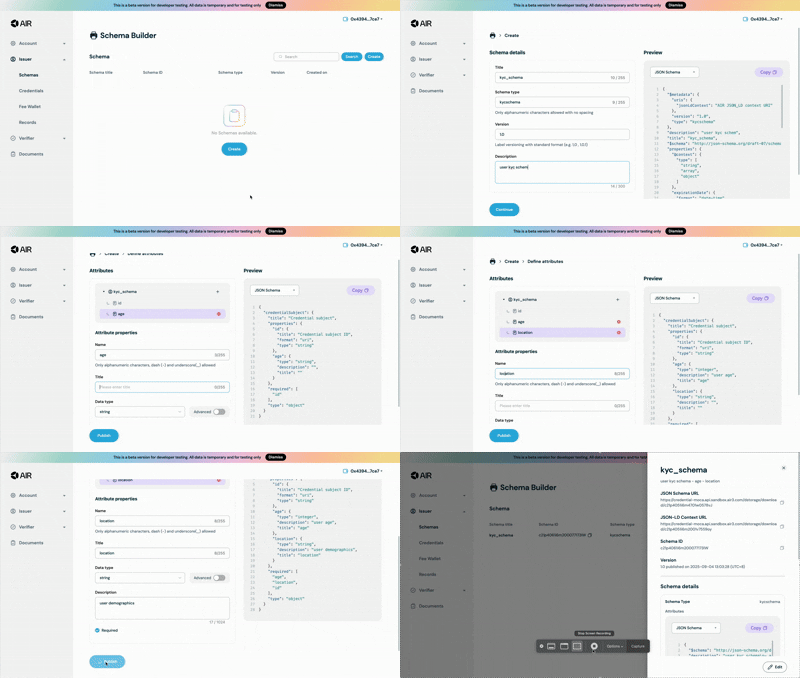
1. Click **"Create New Schema"**
2. Fill in the basic schema information:
* **Title**: Choose a descriptive name for your schema
* **Type**: Select or enter a category for your credential type
* **Description**: Provide a clear explanation of what this schema represents
### Step 3: Define attributes
1. Click **"+"** to add attributes
2. For each attribute, specify:
* **Name**: Field identifier (use camelCase)
* **Type**: Choose from String, Number, Boolean, or Date
* **Description**: Explain what this field represents
* **Required**: Mark if the field is mandatory
### Step 4: Publish your schema
1. Review your schema structure
2. Click **"Publish"** to make it available for credential creation
3. Note the schema ID for use in your applications
## Schema Builder best practices
### 1. Choose descriptive names
* Use clear, descriptive names for your schema title and attributes
* Avoid abbreviations that might be unclear to other developers
* Example: `"memberId"` instead of `"mem_id"`
### 2. Provide clear descriptions
* Write detailed descriptions for each attribute
* Explain the purpose and expected format of each field
* Include any validation rules or constraints
### 3. Use appropriate data types
* **String**: For text data, IDs, names, descriptions
* **Number**: For numeric values, ages, quantities, scores
* **Boolean**: For true/false values, flags, status indicators
* **Date**: For timestamps, expiry dates, event dates
### 4. Consider privacy requirements
* Only include fields that are necessary for your use case
* Remember that users can selectively disclose fields
* Avoid collecting sensitive data unless absolutely required
### 5. Plan for future updates
* Consider how your schema might evolve over time
* Use versioning to manage schema changes
* Design attributes to be extensible
This documentation is built and hosted on [Mintlify](https://mintlify.com), a developer documentation platform.
### Step 2: Create a new schema
1. Click **"Create New Schema"**
2. Fill in the basic schema information:
* **Title**: Choose a descriptive name for your schema
* **Type**: Select or enter a category for your credential type
* **Description**: Provide a clear explanation of what this schema represents
### Step 3: Define attributes
1. Click **"+"** to add attributes
2. For each attribute, specify:
* **Name**: Field identifier (use camelCase)
* **Type**: Choose from String, Number, Boolean, or Date
* **Description**: Explain what this field represents
* **Required**: Mark if the field is mandatory
### Step 4: Publish your schema
1. Review your schema structure
2. Click **"Publish"** to make it available for credential creation
3. Note the schema ID for use in your applications
## Schema Builder best practices
### 1. Choose descriptive names
* Use clear, descriptive names for your schema title and attributes
* Avoid abbreviations that might be unclear to other developers
* Example: `"memberId"` instead of `"mem_id"`
### 2. Provide clear descriptions
* Write detailed descriptions for each attribute
* Explain the purpose and expected format of each field
* Include any validation rules or constraints
### 3. Use appropriate data types
* **String**: For text data, IDs, names, descriptions
* **Number**: For numeric values, ages, quantities, scores
* **Boolean**: For true/false values, flags, status indicators
* **Date**: For timestamps, expiry dates, event dates
### 4. Consider privacy requirements
* Only include fields that are necessary for your use case
* Remember that users can selectively disclose fields
* Avoid collecting sensitive data unless absolutely required
### 5. Plan for future updates
* Consider how your schema might evolve over time
* Use versioning to manage schema changes
* Design attributes to be extensible
This documentation is built and hosted on [Mintlify](https://mintlify.com), a developer documentation platform.